- Opening Outlook
- Changing Your Email Signature
- Selecting the Appropriate Email Signature
- Changing the Email Address You are Sending From
- Deleting Auto-Fill Email Addresses
- Out Of Office Message
- Quick Parts
- Quick Steps
OPENING OUTLOOK
To open Outlook, select the Outlook icon on the desktop (shown below).

CHANGING YOUR EMAIL SIGNATURE
After the initial creation of your signature, any changes must be made by the IT/Technology Department. You may change it temporarily, but they must make the permanent change. Please ask your Community Care Lead if you have any questions regarding changing your signature other than your first or last name.
SELECTING THE APPROPRIATE EMAIL SIGNATURE
Everyone in Community Care should have at least two email signatures to choose from. The one mentioned above, contains your personal email address and VCard. It is your “Action” signature. Your second signature is your “Community Care” signature, which you should always use when sending work orders or corresponding with homeowners, residents, managers, or vendors via email. It is important that they do not reply to you personally in case you are out sick, on vacation or otherwise unavailable. Therefore, you should always use your “Community Care” email signature. This signature only shows the department email address and excludes your personal email.

CHANGING THE EMAIL ADDRESS YOU ARE SENDING FROM
When sending work orders or otherwise corresponding with residents, managers, or vendors through Outlook, you should change the email address you are sending “From” so the response will go to CCPriority or Work Order Updates.
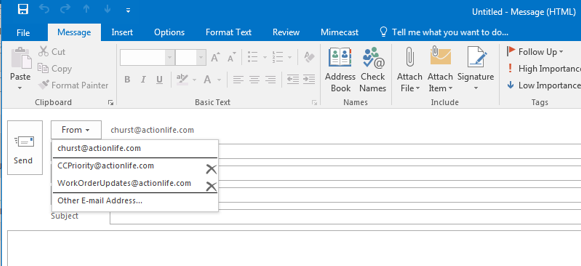
If the “From” option is not available when sending an email, please follow these steps:
- Go to the “Options” tab in your email. You will see “From” as indicated in the screenshot below.
- Click on “From” and it should add this option to your emails going forward. The “From” box will now be highlighted grey as shown in the screenshot below. You will now be able to send from separate email addresses. You will need to enter CCPriority@actionlife.com and workorderupdates@actionlife.com the first time. If the email fails due to permission restrictions, an IT ticket will need to be submitted.

DELETING AUTO-FILL EMAIL ADDRESSES
After you send an email, Outlook will automatically save the email address. The next time you begin typing the address, it will “auto-fill” the remainder of the address. Sometimes it is necessary to remove the auto-fill address to avoid sending emails to an incorrect address.
If you have an older version of Outlook you can remove an auto-fill address by opening an email and typing the first letter of the email address. A drop down should appear with all of the auto-fill addresses that start with that letter. With your mouse left click and hold on the email address you wish to delete. Then press delete on your keyboard. The address will be removed. On newer versions of Outlook there is an “X” next to the auto-fill addresses. Click on the “X” to remove the address.
OUT OF OFFICE MESSAGE
When you leave for the day you should set your “Out of Office” message. Use the following message and update it daily. This is especially important to do if you leave before 5pm each day or if you are going to be out of the office for an extended period of time.
Thank you for your email. I am currently out of the office and will return on [date] at [time]. I will not be checking my email until I return to the office. If this is an emergency, please call 800-400-2284. For non-emergencies you may call 800-400-2284 from 7am to 7pm, or email communitycare@actionlife.com.
*Managers: Please send ALL work order requests to CC Priority or CC General. Please email CC Priority for urgent matters. Work order updates should be sent to workorderupdates@actionlife.com.
Thank you!
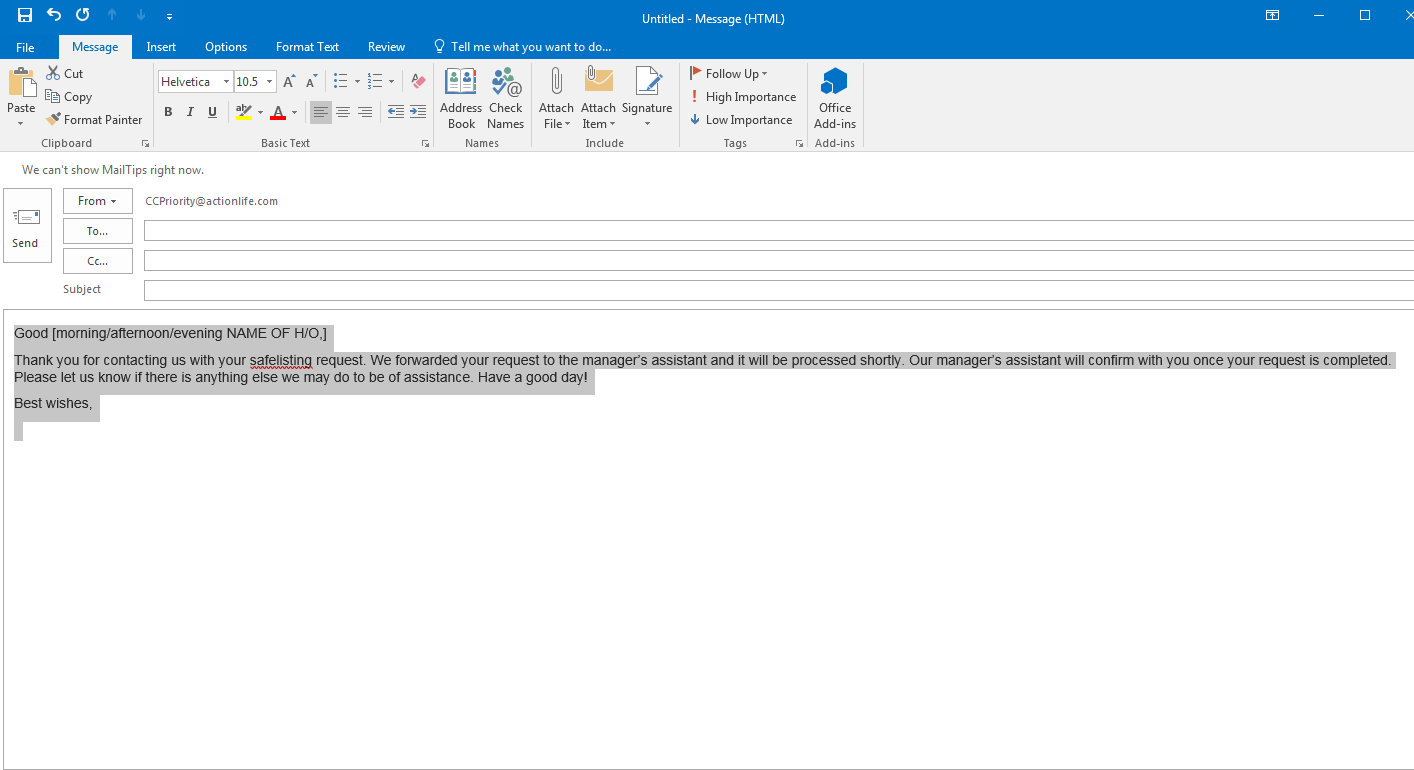
QUICK PARTS
Using Quick Parts will save you time. Since you will often send the same types of emails over and over, you can save an email “template” in Quick Parts and insert it into any email. For example, when you are responding to an appraiser asking for an Appraisal Report, responding to a homeowner who has requested a ledger, responding to a resident’s safelisting request, etc., then you can utilize your saved template. SOP 606: Outlook Quick Part and Quick Step Messages contains Quick Parts which you should save and have ready for use.
Creating a Quick Part
- Select the Content You Want to Save
- The first step involves selecting and highlighting the content that you have created and want to reuse.
- The first step involves selecting and highlighting the content that you have created and want to reuse.
- Add the Selection to Quick Parts
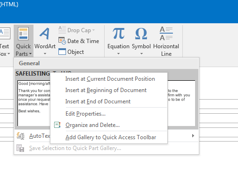
- Now that the content is selected click on the Insert tab in the Ribbon, choose Quick Parts and then click Save Selection to Quick Part Gallery
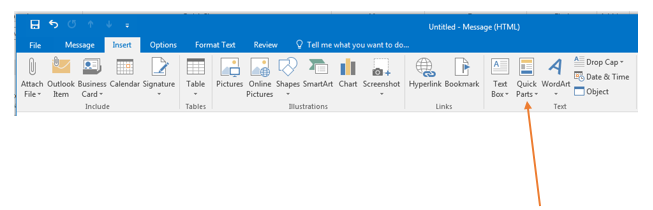
- Now that the content is selected click on the Insert tab in the Ribbon, choose Quick Parts and then click Save Selection to Quick Part Gallery
- Choose a Name for Your New Quick Part
- Choose a name that you want for the Quick Part and press OK. Please see SOP 606: Outlook Quick Part and Quick Step Messages for names for “Answering the Call”, “Accounting”, and “Escrow” Quick Parts. You’ve just created a Quick Part!


- Choose a name that you want for the Quick Part and press OK. Please see SOP 606: Outlook Quick Part and Quick Step Messages for names for “Answering the Call”, “Accounting”, and “Escrow” Quick Parts. You’ve just created a Quick Part!
Using Your New Quick Part
-
- Whenever you want to insert your Quick Part click on the Insert tab in the Ribbon, choose Quick Parts and you will see a gallery with all your saved Quick Parts.

- Clicking on the Quick Part will insert it at the current cursor position.
- You can find more advanced options by right-clicking the desired Quick Part.
- Whenever you want to insert your Quick Part click on the Insert tab in the Ribbon, choose Quick Parts and you will see a gallery with all your saved Quick Parts.
Editing the Content of Your Quick Part
-
- Insert the Quick Part message you wish to edit into an email. Make your corrections then highlight the entire message. Save to the gallery again under the same name. It will ask you if you want to redefine the building block entry. Select “yes.”

- Insert the Quick Part message you wish to edit into an email. Make your corrections then highlight the entire message. Save to the gallery again under the same name. It will ask you if you want to redefine the building block entry. Select “yes.”
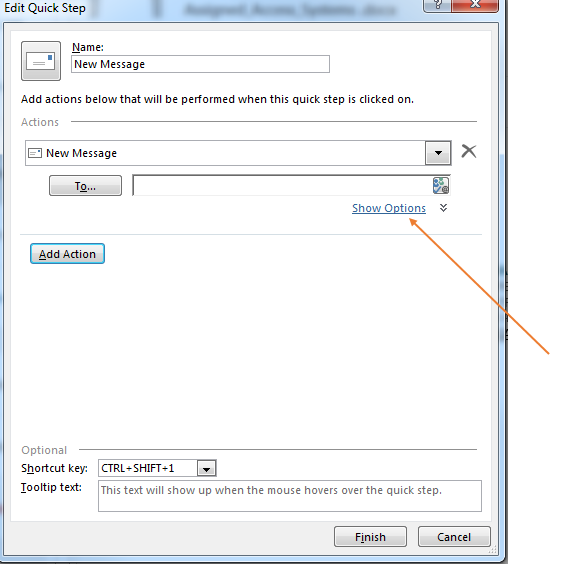
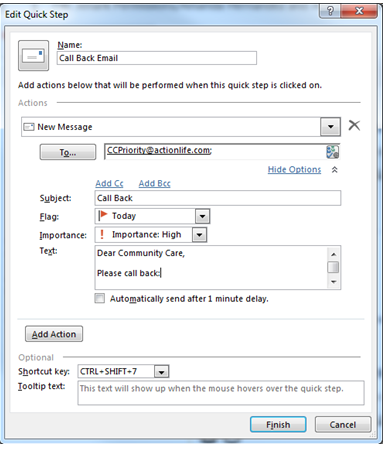
QUICK STEPS
Quick steps can be set up so that you can generate a new email with one click.

- From the Home Screen: Click on “Create New”
- Fill in “Name” of Quick Step
- Choose an Action from the drop down arrow to show “New Message”.
- Fill in “To” and add “CC” or “BCC”, Subject, Flag, Importance, and the body of the text. You must click on “Show Options” to enter this additional information.